Well, I haven't done much sewing lately, but I do have a couple of items to show you.
First is a jean bag lined with cotton fabric, and a couple of zip pouches that I made to go with the jean wallet I made.
I'm also working on a fabric/quilted mini tote to go with this as well .. worked a little on it last night, like 5 minutes, but I do hope to work more on it today.
Also - a couple of days ago I tried out this pattern from KellyRachel.com .....
I made mine from a 12" square of fabric, and it ended up being about as big as my hand .. say 4-5 inches square-ish. I used some scrap ribbon for the handle and to cover up the not so pretty seam.
It's kind of hard to see but there's another pocket in front. The print blends and you can't see the edge of the pocket.
I recommend the FQ bag pattern, it's very simple but very versatile too. I'm going to do a larger one as well. I've seen one done from a 40" square .. I think that would be very kewl!
Showing posts with label jeans. Show all posts
Thursday, June 23, 2011
Friday, June 10, 2011
Jean Wallet Tutorial
The Tutorial for the Jean Wallet is below. If you prefer a pdf file.. click here.
I freely give this for you to use for your own personal use and for gift giving or charity. Please do not sell my pattern as it is not yours to profit from.
Let's begin:
You will need denim material cut from old jeans: (a corduroy material would work as well.)
Use ¼” seam allowance unless otherwise specified.
Outside Pockets
1 – 4 ½” x 6”
1 – 4 ½” x 3”
Base of Wallet
1 – 4 ½” x 10”
Large Inside Pocket:
1 – 3 ¾” x 10”
Inside Pockets:
1 – 2 ½” x 3 ¾” with a Pocket Flap 1 – 3” x 3”
1 – 3” x 3 ½”
I used rectangles that were precut for something else and had to seam two pieces together for the 10” long pieces. I do this by sewing a 3/8” seam and then finger pressing it open before I top-stitch on both sides of the seam. You can make this nearly invisible, or you could choose a high-contrast thread and make it a design feature.
Use a pinking shears and trim the very edge of each piece. You don’t want to reduce the size of the pieces, so be very careful to trim as little as possible.
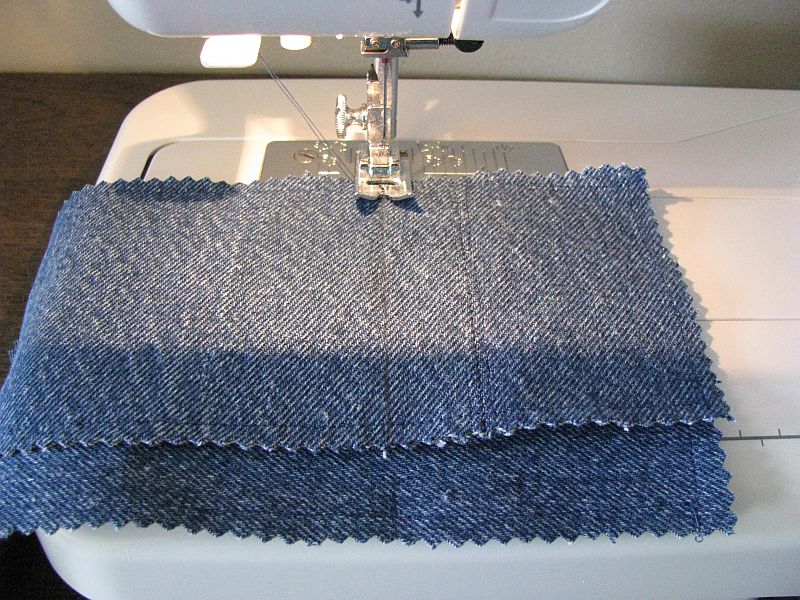
Lay out your Wallet Base and the Large Inside Pocket. Match them on three raw edges. Measure in from one side 3 inches. Draw a line with pencil. This line is your sewing line. Sew on the line as shown here:
Fold the Wallet Base back so that you have just the Large Inside Pocket on one side, and the three layers on the other. Lay your 2 ½” x 3 ¾” pocket on one end, matching the raw edges as shown here. Sew on the three outside edges of this pocket.
Place the Pocket Flap on top of and “above” the pocket. The edge of the flap should be atleast ½” away from the edge of the pocket. Stitch across the top of the flap to hold it in place.
I'd love to see your wallets! Post a comment below and you can link to your blog so that we can see what you've made! I think these wallets would be extra cute with embellishment like fabric paint, embroidery, applique, or beads.
I freely give this for you to use for your own personal use and for gift giving or charity. Please do not sell my pattern as it is not yours to profit from.
Let's begin:
You will need denim material cut from old jeans: (a corduroy material would work as well.)
Use ¼” seam allowance unless otherwise specified.
Outside Pockets
1 – 4 ½” x 6”
1 – 4 ½” x 3”
Base of Wallet
1 – 4 ½” x 10”
Large Inside Pocket:
1 – 3 ¾” x 10”
Inside Pockets:
1 – 2 ½” x 3 ¾” with a Pocket Flap 1 – 3” x 3”
1 – 3” x 3 ½”
I used rectangles that were precut for something else and had to seam two pieces together for the 10” long pieces. I do this by sewing a 3/8” seam and then finger pressing it open before I top-stitch on both sides of the seam. You can make this nearly invisible, or you could choose a high-contrast thread and make it a design feature.
Use a pinking shears and trim the very edge of each piece. You don’t want to reduce the size of the pieces, so be very careful to trim as little as possible.
Next, stitch around each piece a scant ¼” from the edge all the way around so that you have a box of stitching on every piece. Do this with a matching thread.
Lay out your Wallet Base and the Large Inside Pocket. Match them on three raw edges. Measure in from one side 3 inches. Draw a line with pencil. This line is your sewing line. Sew on the line as shown here:
Fold the Wallet Base back so that you have just the Large Inside Pocket on one side, and the three layers on the other. Lay your 2 ½” x 3 ¾” pocket on one end, matching the raw edges as shown here. Sew on the three outside edges of this pocket.
Place the Pocket Flap on top of and “above” the pocket. The edge of the flap should be atleast ½” away from the edge of the pocket. Stitch across the top of the flap to hold it in place.
The pictures below show it after it’s been sewn. You only want to be sewing this pocket through two layers .. the top piece you are attaching and the Large Inside Pocket. The Wallet Base should be folded back out of the way while you are doing the actual sewing.
Next, we will turn this over to be face down, and add our Outside Pockets. You will want to decide which side you want the small & large pockets to be. I put my larger pocket over the top of the pocket & flap end. Lay it out and test folding it to be sure you have it the way you want it.
Then, sew around all 4 outside edges to secure all pockets in place.
Your wallet is complete. Fill it with money and plastic!
I'd love to see your wallets! Post a comment below and you can link to your blog so that we can see what you've made! I think these wallets would be extra cute with embellishment like fabric paint, embroidery, applique, or beads.
Thursday, June 9, 2011
Jean Wallets - Upcycled! :)
Here are two jean wallets I made from jean rectangles that I inherited from my grandmother's stash. She cut the rectangles from old blue jeans.
This was the first:
This is the second:
I'll have a tutorial for the second soon .. hopefully by tomorrow... if I'm lucky, maybe by later today!
Leave a comment and let me know what you think.
This was the first:
This is the second:
I'll have a tutorial for the second soon .. hopefully by tomorrow... if I'm lucky, maybe by later today!
Leave a comment and let me know what you think.
Subscribe to:
Posts (Atom)